Dear D2Trophy Customers!
We just have relaunched Diablo 2 - Resurrected store, at our main RPGStash store! Enjoy 5% Off Voucher code: D2TROPHY to buy your D2R Gold, Runes, Runeswords and any other items!
Yours, D2Trophy Team
Dear D2Trophy Customers!
We just have relaunched Diablo 2 - Resurrected store, at our main RPGStash store! Enjoy 5% Off Voucher code: D2TROPHY to buy your D2R Gold, Runes, Runeswords and any other items!
Yours, D2Trophy Team
D2R Items for Sale at the Cheapest Prices
Overview:
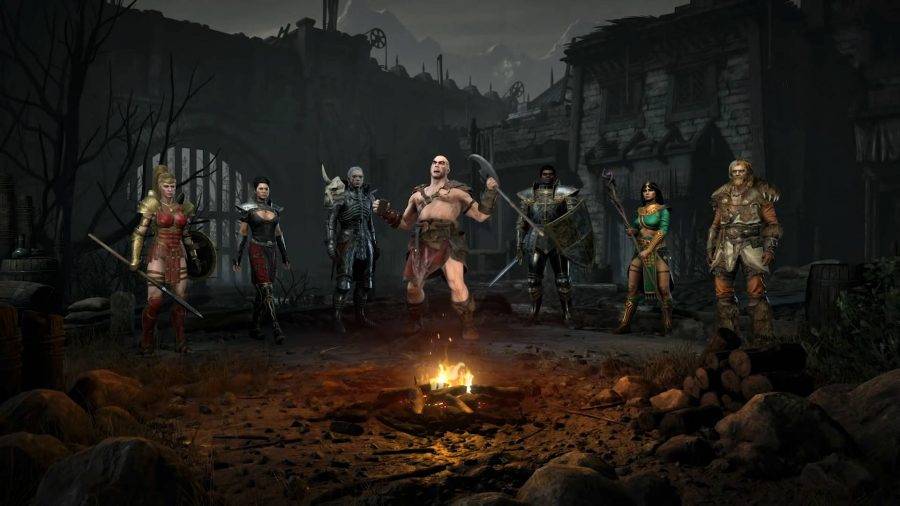
The Summoner is the perfect class for new players who have limited access to items. It is able to clear Hell Difficulty easily with practically no gear. This character is extremely versatile in gearing options and very effective at all forms of PvM.
STRENGTHS
WEAKNESSES
Character Stats
FASTER CAST RATE BREAKPOINTS
Teleport / Corpse Explosion / Amplify Damage
11 Frames = 48 FCR
10 Frames = 75 FCR
9 Frames = 125 FCR < Maximum Reached
FASTER HIT RECOVERY BREAKPOINTS
8 Frames = 39 FHR < Spirit
7 Frames = 56 FHR < Spirit + 10 FHR Boots OR 5 FHR Small Charm
6 Frames = 86 FHR
BLOCKING
While Necromancers are very fragile, good positioning using teleport means that you very rarely get hit. Your army of summons will draw monsters off you 99% of the time so it isn’t worth investing stats into block.
DAMAGE STAT PRIORITY
Mercenary Damage is actually the top priority for Summoners! Despite having an impressive army of skeletons, Corpse Explosion is your main source of damage by a large margin – which means you need to have a corpse handy to begin the “CE Chain”. Summons have mediocre damage and slow attack animations but an Act II Might Mercenary can hit very fast and hard (DO NOT use a Holy Freeze Mercenary which shatters corpses!!!). Ideally, you want to be able to telestomp a single monster and allow your Merc to perform a OHKO (instakill). This will result in maximum efficiency clearing. This also means that you want a slower, hard-hitting weapon to maximise the chances of a OHKO and a lot of damage-buffing auras.
Faster Cast Rate should also be prioritised over +Skills – more mobility = faster runs!
+Poison and Bone Skills increase the radius of your Corpse Explosion, allowing it to hit more targets. However, you do not want to put too many points into Corpse Explosion as the mana cost quickly becomes too high.
+Summoning Skills increases the number of summons you are able to maintain and increases their stats slightly. This stat is often overvalued by players as the effect of having an extra 2 or 3 skeletons is not very impactful on gameplay. While skeletons will do decent sustained damage over time (in boss fights for instance), the majority of your skirmishes will be very short and 80% of the damage dealt will be from Corpse Explosion.
+Curses increases the radius of your Amplify Damage. You want your Corpse Explosion and Amplify Damage to have approximately equal radius.
STRENGTH: Enough to equip items (preferably 0)
DEXTERITY: 0
VITALITY: All Remaining Points
ENERGY: 0
Skill Distribution
20 Skeleton Mastery
20 Raise Skeleton
20 Corpse Explosion
1 Clay Golem
1 Golem Mastery
1 Raise Skeletal Mage
1 Summon Resist
1 Iron Golem
1 Revive
1 Teeth
1 Bone Armor
1 Amplify Damage
These 69 skill points should be seen as the bread and butter of any Summoner. This means that your build is technically complete by level 58. As for the remaining points, there are quite a few options:
The first consideration is the radius of your Corpse Explosion – the High Budget build suggested in this guide gives a total of +15 to Necromancer Skills / All Skills from gear, resulting in a 1- yard explosion radius. This matches a level 19 Amplify Damage so it is a good idea to sync these up:
3 Amplify Damage (4 Hard Points total)
Next, you want to decide whether you want to put points into your summons, your own survivability or more damage output.
Summons: Your Iron Golem is very expensive to replace so it may be a good idea to maximise its life pool. There is no need to put more points into Skeletal Mages or Revives.
19 Golem Mastery (20 Hard Points total)
Rest into Blood Golem
Survivability: There is an argument to be made that you are the weakest link in the Summoner Chain. If you die, so does your entire army. Bone Armor is an extra layer of defense that absorbs melee damage (which you shouldn’t be taking frequently).
20 Bone Armor
1 Bone Wall
Rest into Bone Prison
Damage Route: You can either put points into Bone Spear / Bone Spirit or Poison Nova. These will be only partially synergised and extremely weak. Neither of them benefit from Amplify Damage either. This option is not recommended.
Itemisation
LOW BUDGET
Helm: 2 Necromancer Skills Circlet
Amulet: 2 Necromancer Skills Amulet
Weapon: Any White Runeword (Preferably with +X Raise Skeleton on Base)
Armor: Any Stealth Armor
Shield: Any Spirit Monarch (Larzuk Quest will give 4 sockets)
Gloves: Any Gloves with Strength and Fire Resistances
Belt: Rare Belt with Strength and Life
Boots: 30 FRW Boots with Lightning or Fire Resistances
Ring 1: 10 FCR Ring with Lightning or Fire Resistances
Ring 2: Rare Ring with Lightning or Fire Resistances
Weapon Switch: Naj’s Puzzler
Shield Switch: N/A
Inventory
Any charms with +Life and/or +Resistances that are available.
Nightmare Offensive Mercenary (Might Aura)
Merc Helm: Socket Helm + 3 Perfect Amethysts
Merc Weapon: Insight Colossus Voulge (Larzuk Quest will give 4 sockets)
Merc Armor: Socketed Armor + Ral + Ort + Thul + 15 IAS Jewel
INCREASED ATTACK SPEED BREAKPOINTS
Act II Mercenary / Colossus Voulge / Jab
6 Frames = 35 IAS
5.5 Frames = 56 IAS
5 Frames = 89 IAS
MEDIUM BUDGET
Helm: Harlequin’s Crest (Shako) + Perfect Topaz
Amulet: Mara’s Kaleidoscope
Weapon: Heart of the Oak Flail
Armor: Any Enigma (Spend your entire budget here – TOP PRIORITY!)
Shield: Any Spirit Monarch
Gloves: Trang Oul’s Claws
Belt: Arachnid Mesh
Boots: Aldur’s Advance
Ring 1: 10 FCR Rare Ring with Lightning Resistances
Ring 2: 10 FCR Rare Ring
Weapon Switch: Call to Arms Crystal Sword or Flail
Shield Switch: Spirit Monarch
*Life, Mana, and Strength are desirable affixes on Rare and Crafted Items
Insight Iron Golem
Inventory
Any charms with +Life and/or +Resistances that are available.
Any Summoning Skill Grand Charms that are available.
Low-End Annihilus and Hellfire Torch
Gheed’s Fortune
Nightmare Offensive Mercenary (Might Aura)
Merc Helm: Guillaume’s Face + 15 IAS Jewel
Merc Weapon: Ethereal Bonehew + Shael + Amn Rune
Merc Armor: Any Treachery Armor
INCREASED ATTACK SPEED BREAKPOINTS
Act II Mercenary / Ogre Axe / Jab
5 Frames = 63 IAS
4.5 Frames = 105 IAS
4 Frames = 200 IAS
HIGH BUDGET
Helm: 2 Necromancer Skills / 20 FCR / 5 Mana After Each Kill / 2 Socket Diadem + 2x 9 Energy / 15 Mana / 3 Mana After Each Kill / 30 Fire Resistance Jewels
Amulet: 2 Necromancer Skills / 20 FCR / Teleport Charges Crafted Caster Amulet
Weapon: Beast War Scepter
Armor: Enigma Armor (See Below)
Shield: Spirit Monarch
Gloves: Magefist Battle Gauntlets
Belt: Arachnid Mesh
Boots: Silkweave
Ring 1: 10 FCR / 20+ Lightning Resistance Crafted Blood Ring
Ring 2: Stone of Jordan
Weapon Switch: Call to Arms Crystal Sword or Flail
Shield Switch: Spirit Monarch
*Life, Mana, and Strength are desirable affixes on Rare and Crafted Items
**Enigma base can be Wire Fleece or Archon Plate depending on how much Strength you gain from amulet and helm slots
***Magefist chosen over Trang Oul’s Claws for the Mana Regeneration
Pride Iron Golem
Inventory
Annihilus
Hellfire Torch (Necromancer)
Up to 9x 45 Life Summoning Skill Grand Charm
10x 5 All Resistances / 20 Life Small Charm
Nightmare Offensive Mercenary (Might Aura)
Merc Helm: Andariel’s Visage + 30 Enhanced Damage / 9 Strength / 30 Fire Resist Jewel
Merc Weapon: Ethereal Infinity Great Poleaxe
Merc Armor: Ethereal Jeweler’s Sacred Armor of the Whale + 1x 15 All Resist / 15 IAS Jewel + 3x 40 Enhanced Damage / 15 IAS Jewel
INCREASED ATTACK SPEED BREAKPOINTS
Act II Mercenary / Great Poleaxe / Jab / Level 9 Fanaticism
5 Frames = 14 IAS
4.5 Frames = 35 IAS
4 Frames = 75 IAS < Maximum Reached
Gameplay
LOW BUDGET
When you start a new game, the first thing to do is to summon your army. One convenient method is to go to Act 5 and take the red portal next to Anya (to Pindleskin). You will be able to raise the corpses there. If this is your method of choice, be sure not to pick up the Halls of Pain waypoint and kill Nihlathak or the portal will close. Alternatively, you can raise skeletons as you go.
One of the inconvenient things about playing a low budget summoner is that you have very little control over what your mercenary or summons actually attack. Over time, they tend to spread out and do a poor job following you as you run. Naj’s Puzzler is an excellent weapon that will allow you to reposition your army and telestomp the occasional high priority target and can be used as a weapon switch. It is important to note that switching weapons will make you lose a few summoning skill points and will probably despawn one of your skeletons. If Naj’s Puzzler is unavailable, circlets and amulets with teleport charges can be used sparingly as a substitute.
Start an engagement by casting Amplify Damage on everything – this increases the damage of your army and Corpse Explosion as well. As soon as a corpse becomes available, you can use Corpse explosion to quickly wipe out everything in sight. This is most effective in solo play but still works reasonably well up to Players 5.
MEDIUM BUDGET
Your gameplay changes dramatically once Enigma becomes available. This gives you real control over your mercenary and summons and opens up the potential of the Iron Golem. You can turn your Insight into a golem which will inherit Meditation Aura, allowing your mercenary to equip a much more damaging weapon.
At this point, there are few monsters in the game which are very threatening. The Top 3 are Souls, Dolls and Tomb Vipers. Souls can be dealt with fairly easily with a Thundergod’s Vigor Belt or Wisp Projector Ring but it is generally better to avoid areas with Dolls and Vipers altogether. Summoners do very well in most areas but Corpse Explosion is particularly good in high density zones (Chaos Sanctuary, Cows, Shenk + Eldritch etc).
HIGH BUDGET
Fully built summoners are somewhat rare since most people select this class for its low-budget viability. The optimisations in the High Budget variation are mostly focused on maximising your reactive corpse generating speed by increasing merc damage. Stacking damage auras will also increase the effectiveness of your summons significantly.
It is also possible to do Ubers with this type of build. The key is to collect a bunch of Urdar Revives from the River of Flame. This monster type uses a Smite attack with a 25% Chance of Crushing Blow which is very effective at burning through an Uber’s life pool. After collecting these revives, enter the Tristram Portal and teleport around the perimeter until you are able to lure one of the Ubers. Kill them one at a time and use Decrepify to limit their damage output. You should not be taking any hits while doing this so it is unnecessary to stack resistances.
The High Budget Summoner finishes with approximately:
Check out our brand new D2R build guides:
![]()
![]()